
If you are a developer who comes from data science used to working with containers directly on interactive Jupyter notebooks then this tutorial is for you. We go through a simple procedure for setting up and working with Jupyter notebooks on a supercomputer.
In this tutorial, you will
- Transfer a Docker container and convert it to a Singularity container on the supercomputer.
- Start a Jupyter instance on a compute note on the supercomputer.
- Access the remote Jupyter kernel from a local Jupyter notebook on your machine.
As an example, we will use EuroHPC JU supercomputer LUMI, one of the fastest in the world. The same procedure also works on Leonardo supercomputer.
Prerequisites
- For this tutorial, you will need access to a supercomputer.
- You will need a basic understanding of what a container is.
- You’ll also need some knowledge of the UNIX Shell commands.
Disclaimer
→ The workflow described in this tutorial may be different for other supercomputers. Get help from the supercomputer’s documentation or the admin support team if needed.
→ Using containers with GPU capabilities can be even more supercomputer-specific due to different architectures (NVIDIA, AMD, etc). ENCCS and other EuroCC Competence Centres can give you hands-on support if you are a company located in Europe.
LUMI has an easy-to-use web interface where you can run Jupyter Notebooks among other interfaces. This is NOT a tutorial on how to use that interface. It is a more general approach to how to run Jupyter Notebooks on any supercomputer by using a technique called SSH-tunneling.
1 Docker and Singularity containers
A container is a unit of software that packages up module dependencies so your code or application runs quickly and reliably from one computing environment to another. Docker is a type of container that is very popular among developers. However, Docker cannot run on a supercomputer as it requires root access. Docker containers can however be easily converted into Singularity containers, which can run on HPC systems.
We will not go through how to build a Docker container in this tutorial. There are multiple containers already online on Github or https://hub.docker.com. More specifically for our tutorial, the Jupyter team is maintaining a list of containers that one can easily use. We will use base-notebook which has a basic Jupyter Lab functionality. You can go through the list and pick the container that feels right for your workflow.
2 Building the container image on the supercomputer
Let’s first log into LUMI. Start your terminal app and type
ssh -i PATH_TO_SSH_KEY/id_ed25519 USER_NAME@lumi.csc.fiReplace PATH_TO_SSH_KEY with the path to your SSH keys (e.g. ~/.ssh/id_rsa) and USER_NAME with the one that LUMI provided you with. If you have access to a different supercomputer the address at the end will be different.
Check our previous tutorial to learn more on how to get started with a supercomputer, including creating SSH keys, logging in, and running jobs.
Once you log in you will see the following
*  ▒▒▒▒▒▒▒▒▒▒▒▒▒▒▒▒▒▒▒▒▒▒▒▒▒▒▒▒▒▒▒▒▒▒▒▒▒▒▒▒▒▒▒▒▒▒▒▒▒▒  *   *      *
                                                       *      *  *
   * ████       ████   ████   █████▄    ▄█████   ████     *     *
 *   ████       ████   ████   ████ █▄  ▄█ ████   ████         ,    *,
     ████       ████   ████   ████  ████  ████   ████  *   *  |\_ _/|
     ████       ████   ████   ████   ▀▀   ████   ████   *    .| ." ,|
  *  ████       ████   ████   ████        ████   ████        /(  \_\)
     ████       ████   ████   ████        ████   ████       /    ,-,|
 *   ████▄▄▄▄▄  ▀███   ███▀   ████        ████   ████ *    * /      \
     █████████    ▀▀███▀▀     ████        ████   ████  * ,/  (      *
 *                                                     ,/       |  /
  * ▒▒▒▒▒▒▒▒▒▒▒▒▒▒▒▒▒▒▒▒▒▒▒▒▒▒▒▒▒▒▒▒▒▒▒▒▒▒▒▒▒▒▒▒▒▒▒▒▒▒/    \  * || |
                 *              *               ,_   (       )| || |
*   *    *    The Supercomputer of the North  * | `\_|   __ /_| || |
        **               *            * *       \_____\______)\__)__)
   .********----------*******-------******----------****************.
   |User guide and support _________________________________________|
   |         https://docs.lumi-supercomputer.eu                     |
 * |         https://lumi-supercomputer.eu/user-support             |

USER_NAME@uan03:~>
The first point of contact is through a login node. The login node is used to administer your jobs, like creating folders installing modules, etc. We will later allocate a compute node to start using our notebooks.
Building the Singularity container
The first job we need to do is building our container on LUMI. This may take several GB of our allocated storage depending on your container. By running the command pwd we see that we are located in our user folder /users/USER_NAME. Our user folder may not have the capacity to store the container image, so we choose to store it in the allocated project folder. On LUMI we can access this folder by typing
cd /scratch/PROJECT_NAME You replace PROJECT_NAME with the project name that LUMI has provided you with (e.g. project_355000440).
Now we have to create a folder where the container image will be residing. We call it jupyter-tunnel and we select the folder.
mkdir jupyter-tunnel
cd jupyter-tunnelNow we can build the container by pulling the jupyter-base docker file from https://hub.docker.com and transform it into a Singularity container simply by running the following command.
singularity pull base.sif docker://jupyter/base-notebookThis command pulls a docker container from https://hub.docker.com/r/jupyter/base-notebook and stores it as a singularity container called base.sif in our folder.
There are multiple containers you can use on https://jupyter-docker-stacks.readthedocs.io/en/latest/using/selecting.html. GPU-ready containers may be supercomputer-specific due to the different architectures (LUMI has AMD GPU, while Leonardo has NVIDIA GPUs). Contact us or the system admin teams of the supercomputer you have access to for more information.
You will have to do the steps above only once. You can repeat the procedure if you need to pull different containers or update the current ones.
3 Starting a Jupyter instance on the supercomputer
First, we need to allocate a compute node as we mentioned earlier. On supercomputers, we do that with SLURM. See more on that in our previous tutorial. For this example, we will use the salloc command that reserves an interactive compute node for us to run our Jupyter Notebook.
Allocating a compute node
To see what nodes and partitions there are on LUMI we type the command
sinfo -sPARTITION AVAIL TIMELIMIT NODES(A/I/O/T) NODELIST
debug up 30:00 6/2/0/8 nid[002500-002501,002504-002506,002595-002597]
interactive up 8:00:00 4/0/0/4 nid[002502,002507,002594,002599]
q_fiqci inact 15:00 0/1/0/1 nid002598
q_industry up 15:00 0/1/0/1 nid002598
q_nordiq up 15:00 0/1/0/1 nid002503
small up 3-00:00:00 276/17/13/306 nid[002280-002499,002508-002593]
standard up 2-00:00:00 1442/217/69/1728 nid[001000-002279,002600-003047]
dev-g up 3:00:00 32/15/1/48 nid[005002-005025,007954-007977]
small-g up 3-00:00:00 193/2/3/198 nid[005026-005123,007852-007951]
standard-g up 2-00:00:00 2469/87/172/2728 nid[005124-007851]
largemem up 1-00:00:00 1/5/0/6 nid[000101-000106]
lumid up 4:00:00 1/6/1/8 nid[000016-000023]Let’s pick one node on the interactive partition for 2 hours.
salloc --nodes=1 --time=02:00:00 --account=PROJECT_NAME --partition=interactiveSame as before, replace PROJECT_NAME with the project name that LUMI has provided you with.
salloc: Pending job allocation 7116989
salloc: job 7116989 queued and waiting for resources
salloc: job 7116989 has been allocated resources
salloc: Granted job allocation 7116989
As we see above, the allocation has been granted. To start the Jupyter Notebook on the compute node that we were allocated, we need the node name. This we can check with
squeue -u USER_NAME JOBID PARTITION NAME USER ST TIME NODES NODELIST(REASON)
7116989 interacti interact USER_NAME R 2:14 1 nid002502Our allocated node is called nid002502. This will be different for every allocation so remember to change it if your allocation runs out.
Starting a Jupyter server
Let’s start the Jupyter server on the supercomputer.
srun singularity exec -B /users/USER_NAME:/notebooks /scratch/PROJECT_NAME/jupyter-tunnel/base.sif jupyter lab --allow-root --ip 0.0.0.0 --notebook-dir /notebooks --NotebookApp.token='PASSWORD'Command details
- With
srunwe specify that we will use our allocated compute node. singularity execexecutes the Singularity container.-B /users/USER_NAME:/notebookstells Singularity to bind the/notebooksdirectory on the supercomputer’s filesystem to the same directory inside the container. This allows you to access files from the supercomputer within your Jupyter notebook./scratch/PROJECT_NAME/jupyter-tunnel/base.sif: This is the path to the Singularity image file (.sif) that contains the Jupyter Lab application and its dependencies.jupyter labstarts a new instance of Jupyter Lab.--allow-rootgives it the necessary permissions to access files on the supercomputer--ip 0.0.0.0sets the IP address of the Jupyter server to0.0.0.0, which means it will listen for incoming connections from anywhere (not just localhost)--notebook-dir /notebooksspecifies the directory where Jupyter should store its notebooks.--NotebookApp.token='NOTEBOOK_PASSWORD'sets a password for the notebook.
You must keep this terminal window running. Remember to change USER_NAME, PROJECT_NAME, and NOTEBOOK_PASSWORD to your own.
4 Create an SSH tunnel locally
The Jupyter server has now started. Now open a new local terminal window (not on the supercomputer) and run the following
ssh -v -N -L localhost:38888:NODE_NAME:8888 USER_NAME@lumi.csc.fiCommand details
-vincreases the verbosity of the SSH output, which can be helpful for debugging.-Ntells SSH not to execute any remote commands. Instead, it sets up a tunnel (port forwarding)-Lsets the tunnel.localhost:38888is the local address and port that you want to forward traffic from.NODE_NAME:8888: This is the remote address and port that you want to connect to.8888is the port number on which Jupyter is listening. It is usually set to 8888 on supercomputers by default.
With this command, we create a tunnel that communicates with the remote kernel on LUMI. We have chosen localhost:38888 as our local IP address. Remember to change NODE_NAME to the compute node that you got allocated. In our case it is nid002502. Both terminal windows need to keep running.
Now you can simply open JupyterLab by visiting http://localhost:38888 on your preferred browser.
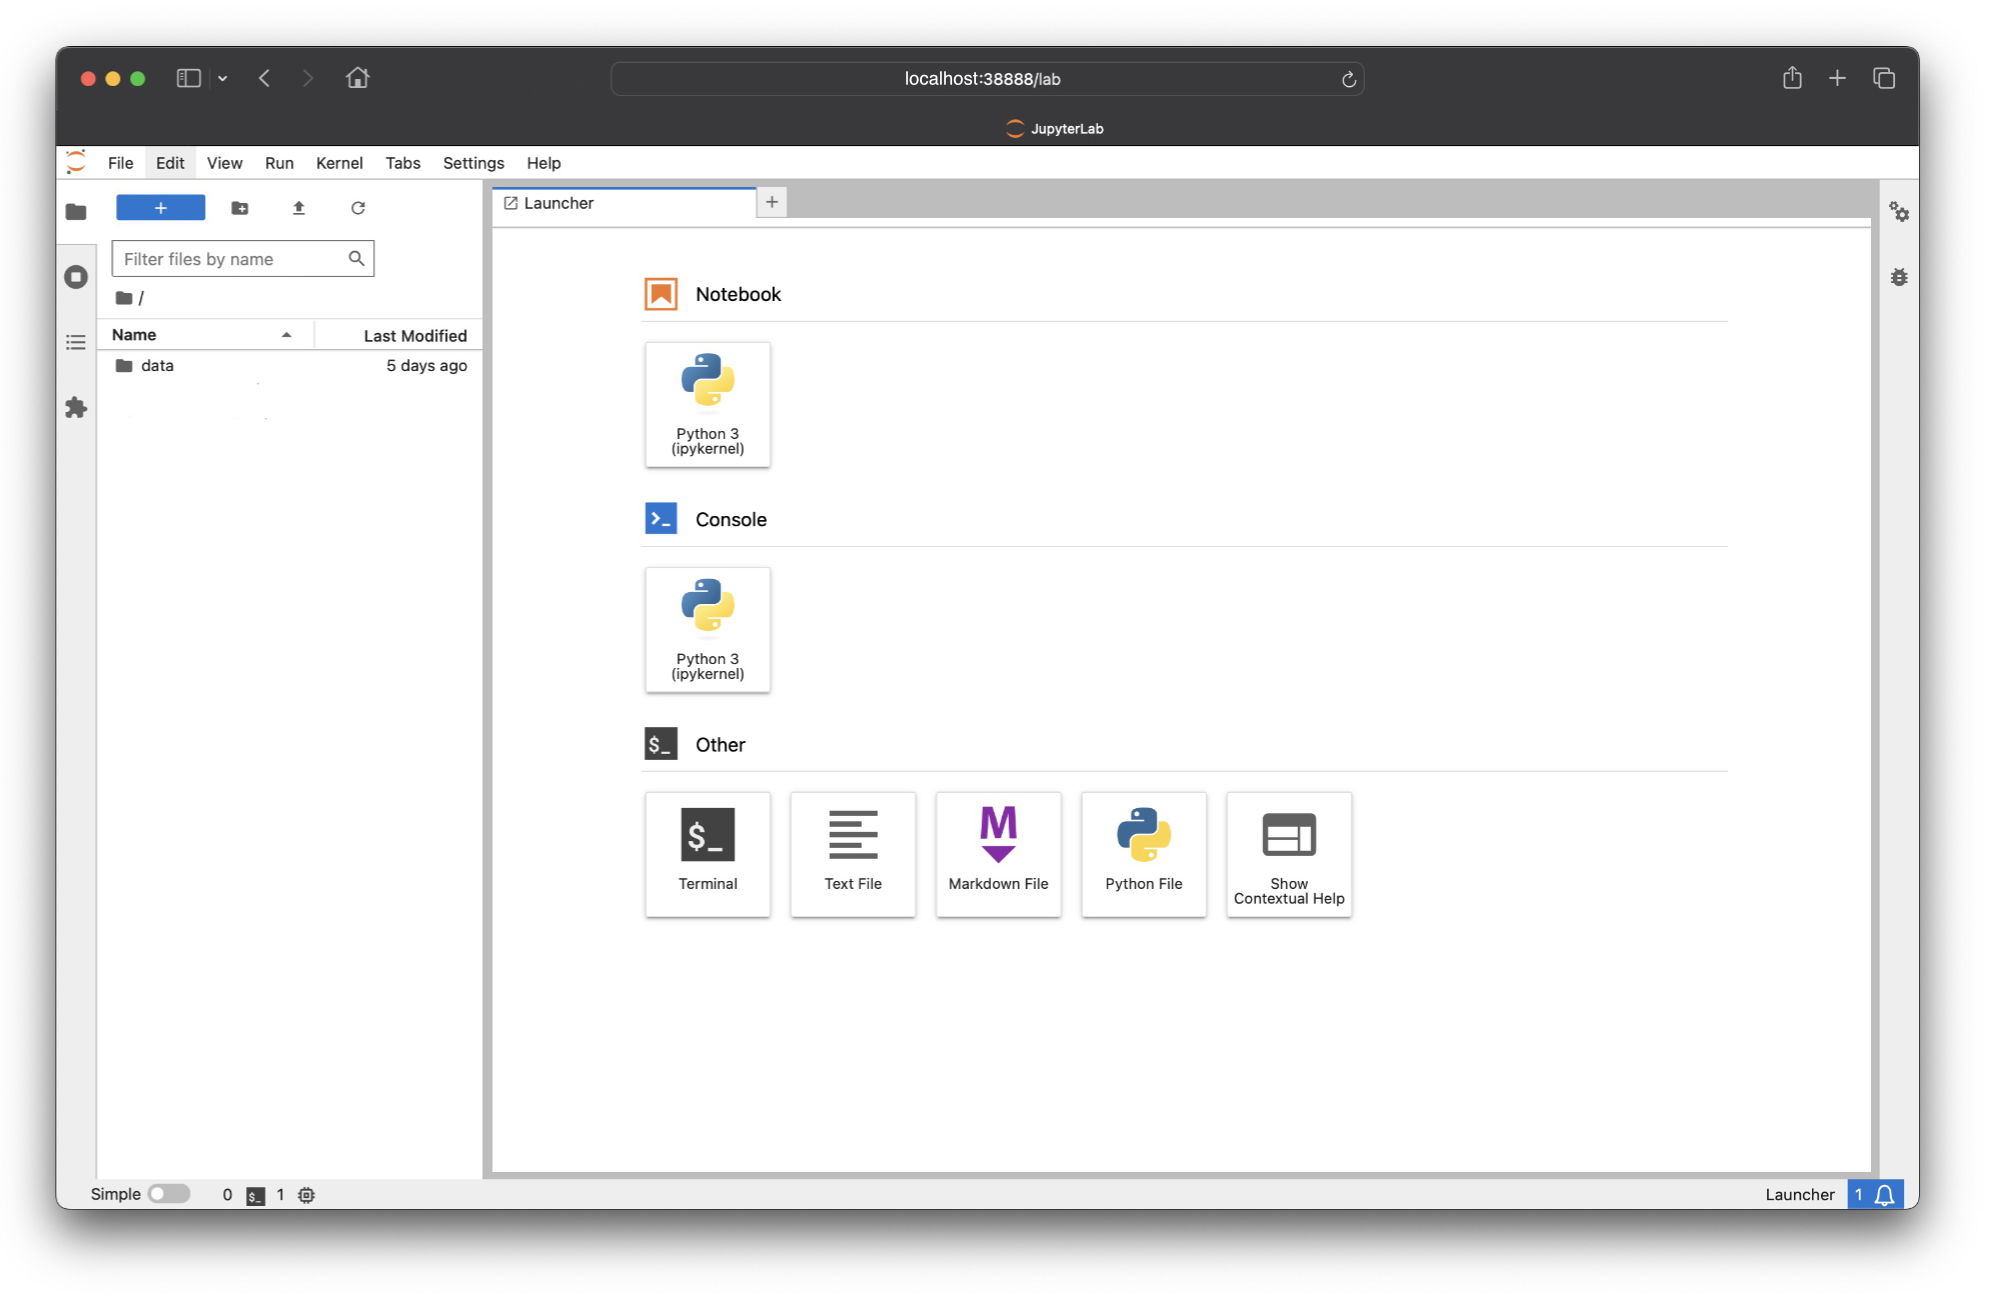
You can work on this JupyterLab interface as you would on your local machine.
But let’s do a final test to make sure that we are running on the compute node that we allocated on LUMI. Let’s create a new notebook on our side menu called jupyter-test.ipynb. We can type the following command on a notebook cell and run it.
import os
os.system("hostname")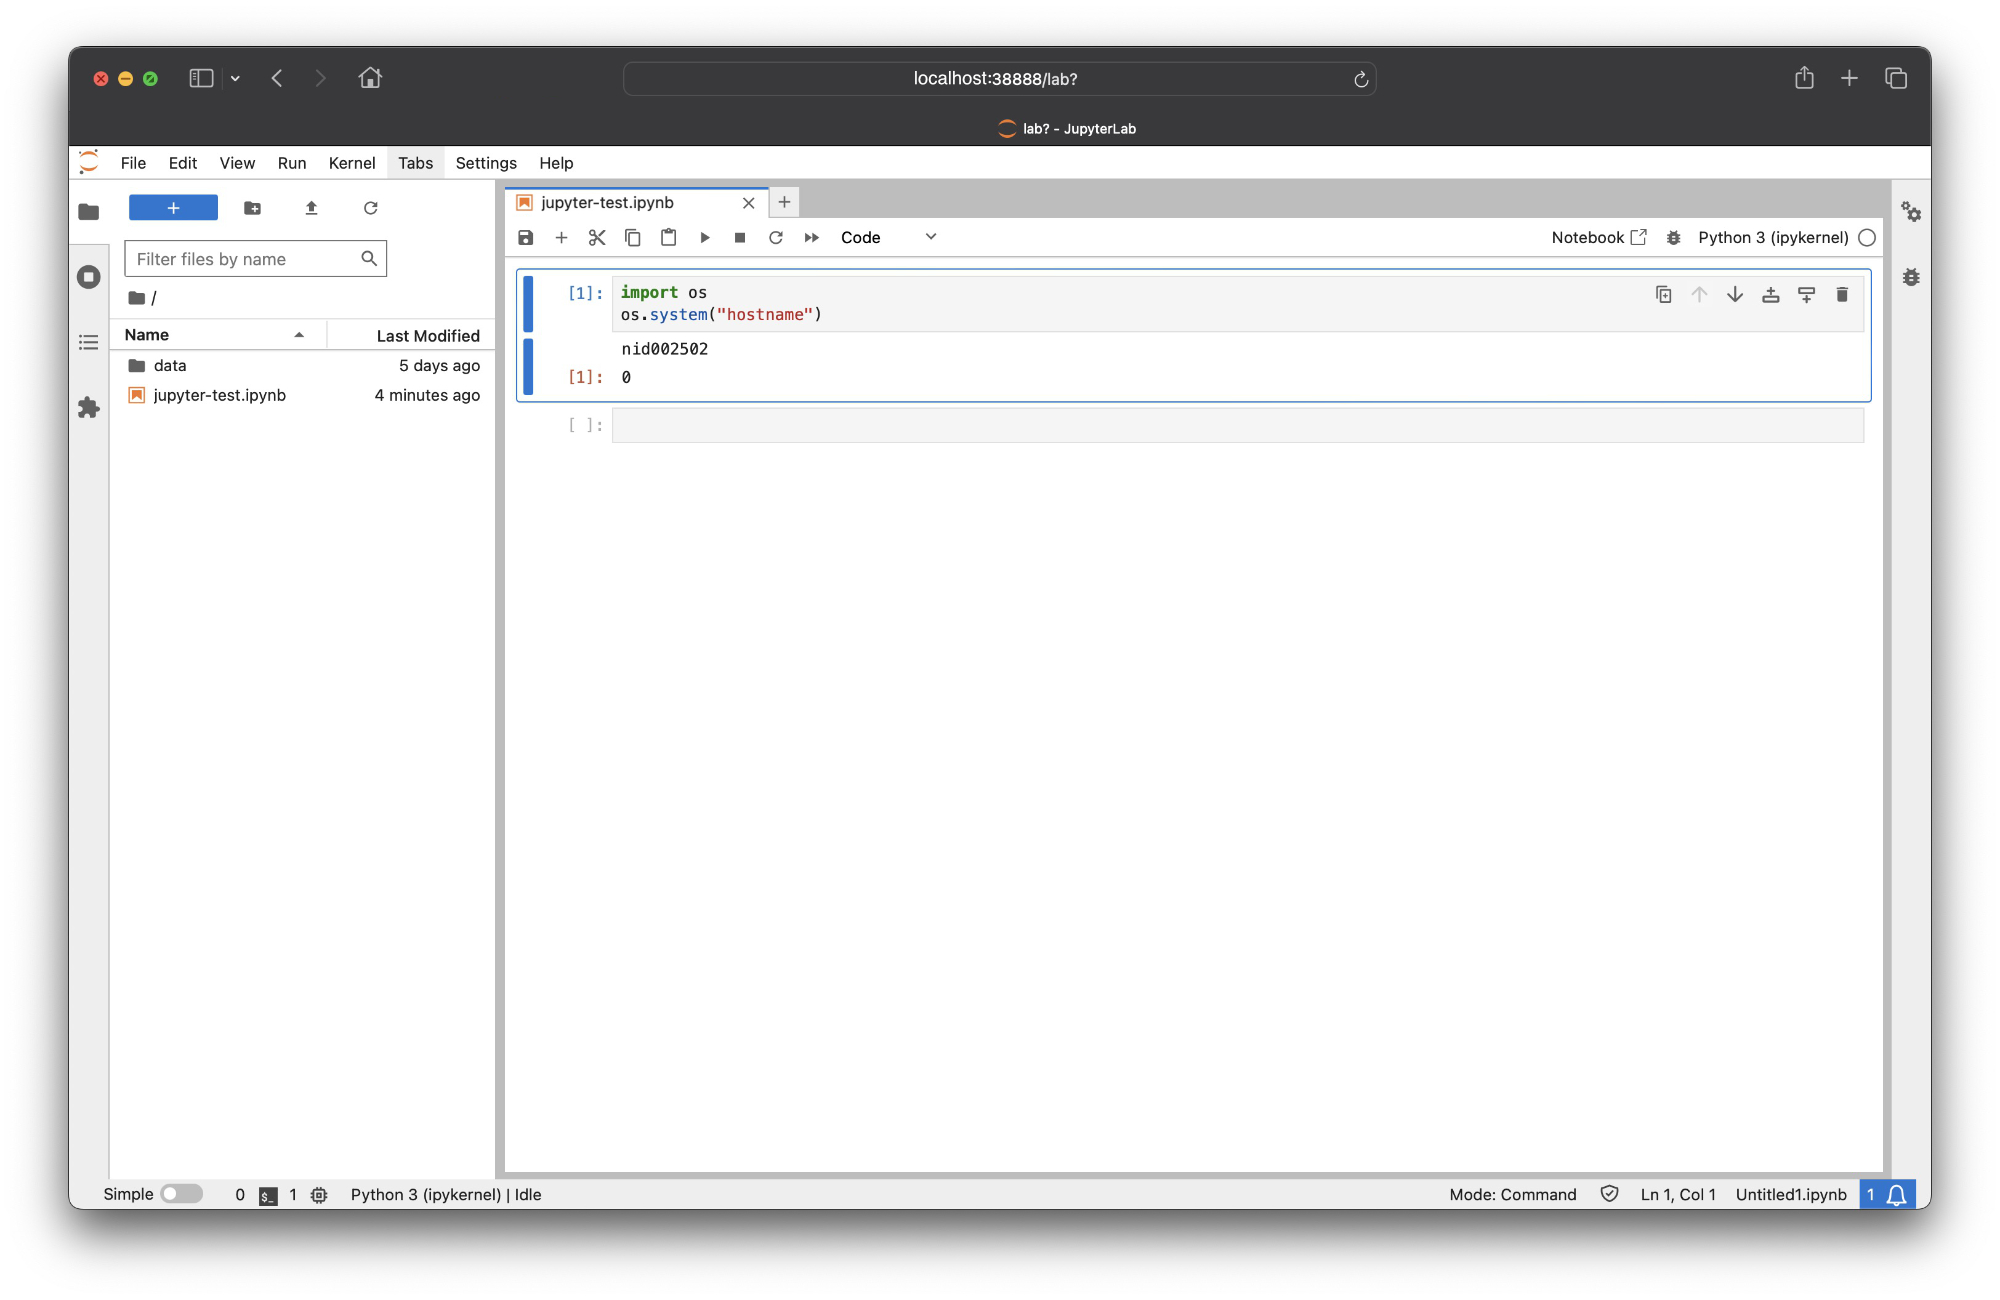
As we see, we get nid002502 which is the name of the node that we allocated with the salloc command.
Conclusion
In this tutorial, we gave you a brief idea of how you can use the flexibility of Jupyter Notebooks on a supercomputer. There are multiple variations depending on the architecture of the supercomputer, or different container modules. When in doubt, you can consult the documentation of the supercomputer you have access to, the system admin team, or, if you’re located in Europe, your local HPC competence centre such as ENCCS.
If you are working in a European company or organisation and interested in getting access to LUMI or any other EuroHPC JU supercomputer please check our Get Supercomputing Access page or contact us at info@enccs.se.